RMA from Sales Orde
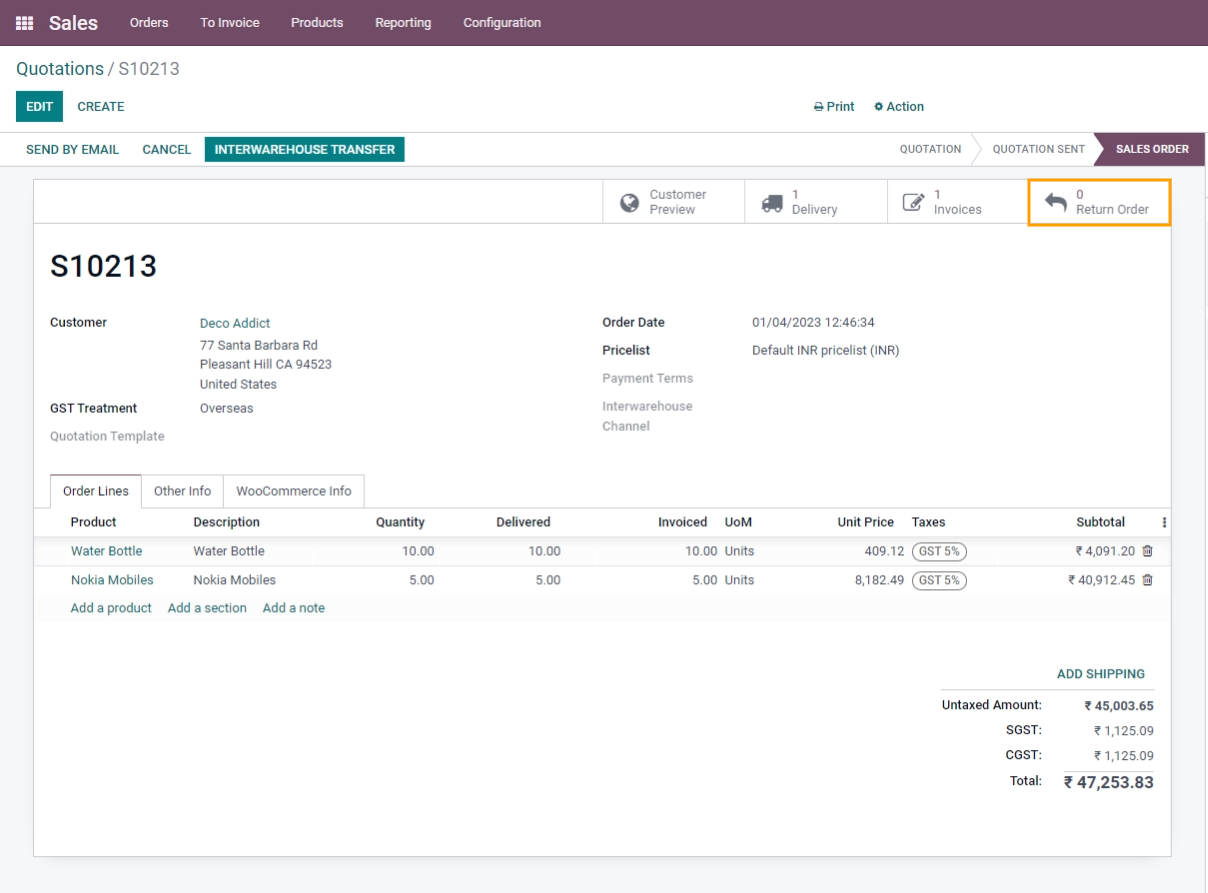
Create RMA from Sales Order
To create RMA from a delivery order navigate to
Fill in the required details in the Return Window form which appears as shown below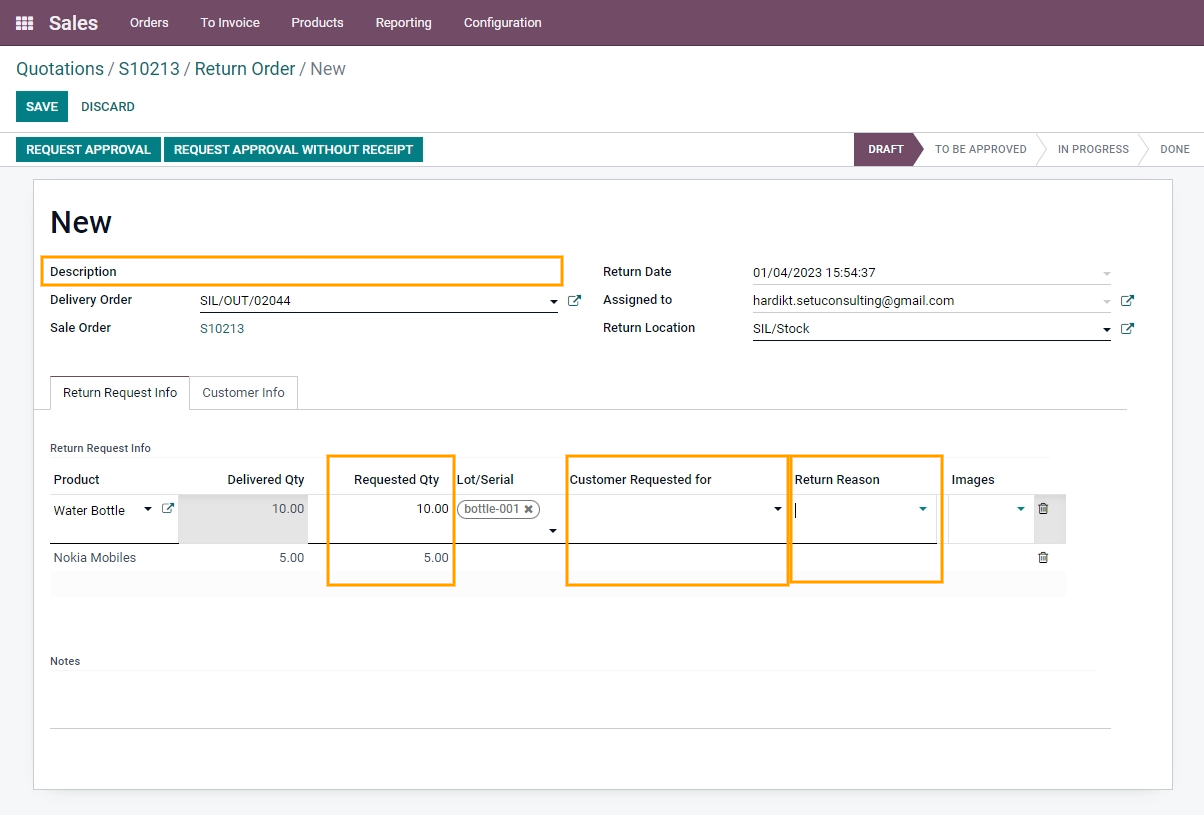
Terminologies
- Description: You can mention the RMA name in this field.
Delivery Order: When RMA is created from Sales Order, the delivery Order will appear by itself. If RMA is generated manually, then select the delivery order from the dropdown option for which you would like to create RMA.
Return Date: It will be set automatically.
Assigned to: If you want to assign this RMA to any user you can set the user name in this field.
Product: A list of all the Products of Sale Order appears by itself if RMA is created from Sales Orders. When RMA is created manually through method B the user needs to select products manually from the dropdown list of all products.
Requested Quantity: Select the quantity for which you would like to request RMA.
Customer Requested for: Select any one Return operation here out of 4(Refund, Repair, Replace & Buyback).
Additional Feature:
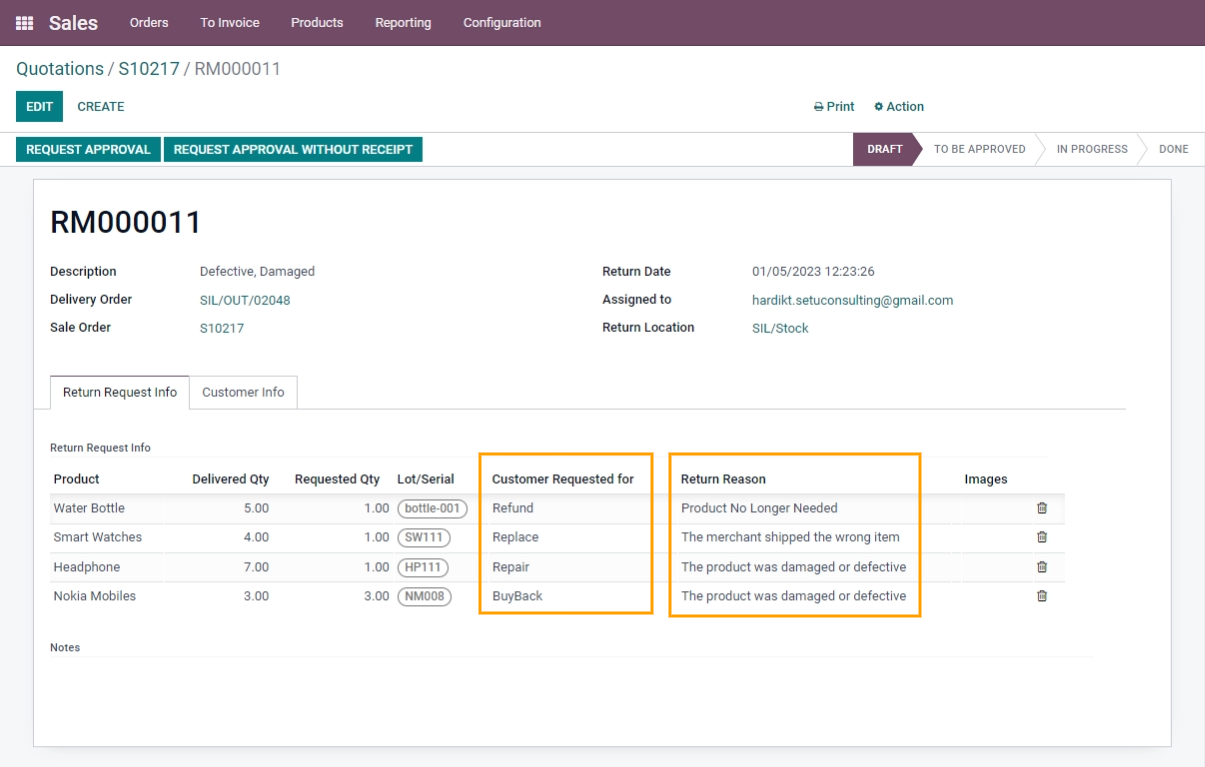
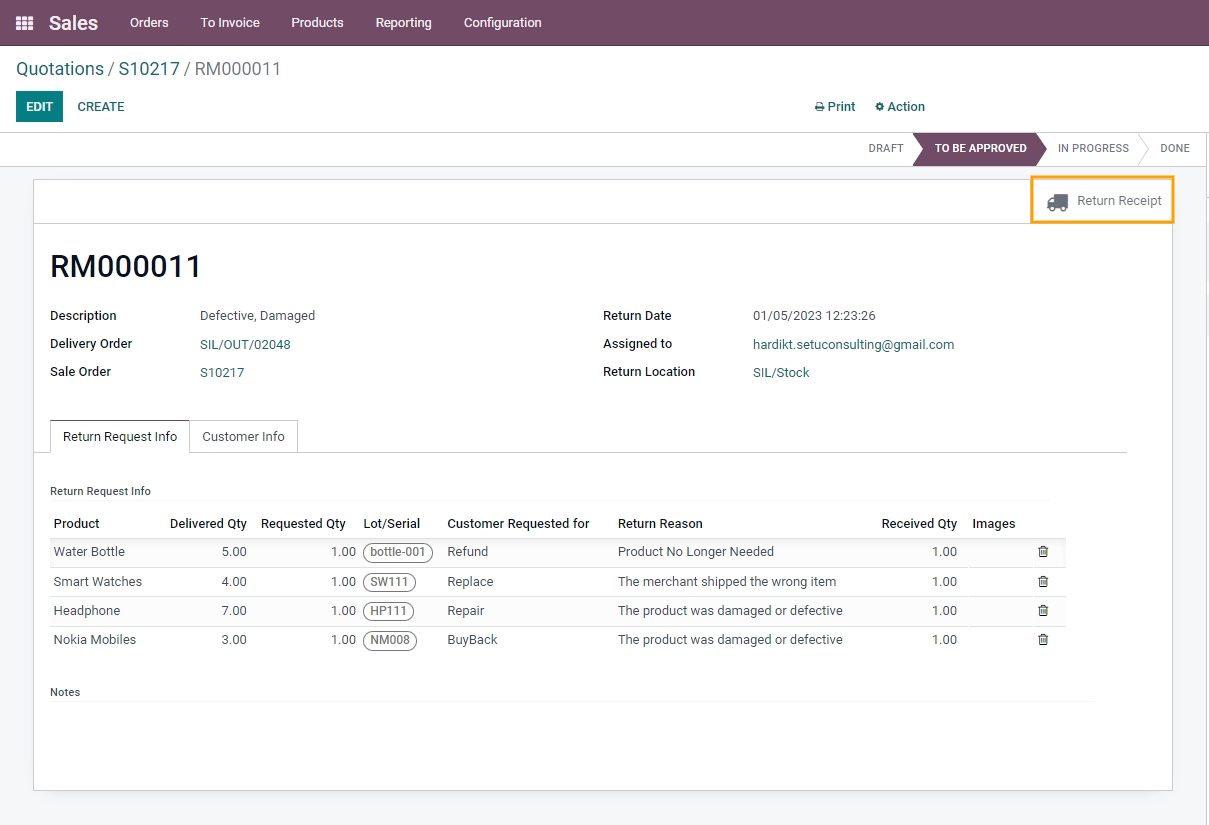
Here for multiple products in single sale Order, the User can create Return Request for Multiple Return operations simultaneously in the same Return Order itself. No need to create different Return Orders for different Return Operations of products.
For example: For Sale Order S10217,
For Product - 1. Water Bottle: Customer requested for the refund operation
2. Smart Watch: Customer requested for the Replace operation
3. Headphone: Customer requested for the Repair operation
4. Nokia Mobiles: Customer requested for the Buyback operation
So, the same operation will be selected from the dropdown list in the ‘Customer Requested for’ column for all products in the same Return Order, as shown in the below figure.
Click on ‘Request Approval’ or ‘Request Approval without Receipt’ after filling all details in the RMA form.
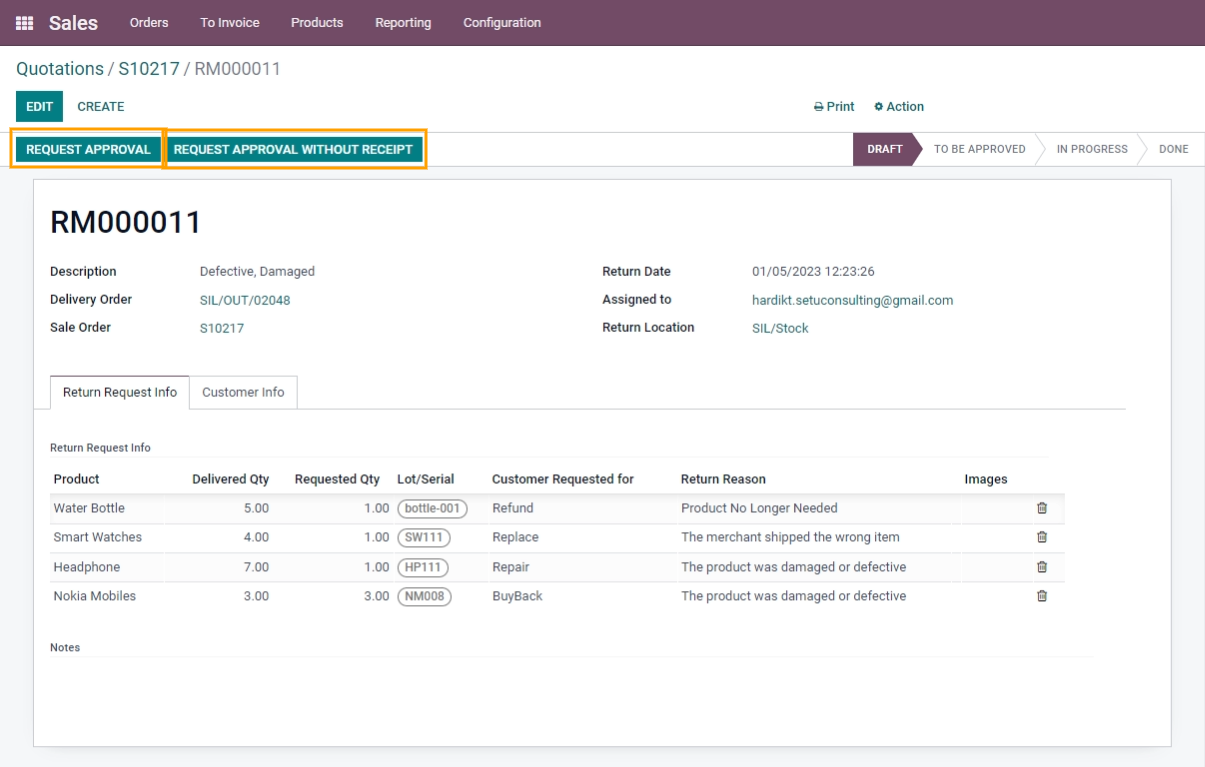
Request Approval: When we create RMA, we can also create a receipt for the original product which we sold to the customer. Once we get this product, we can approve the RMA request. If you click on the Request Approval button, it will create a receipt.
Request Approval Without Receipt: If you click on this option the receipt will not be generated. (i.e. in case the item is defective then you can select this option)
Click on Return Receipt to Validate it once it is generated if you click on the ‘Request Approval’ button.
Validate RMA
After the product is received at the warehouse from the customer, click the 'Validate' button.

Select the Return Order for which the Return Receipt has been validated, then click the 'Return Approve' or 'Return Reject' button as needed
=> In case you reject the RMA, you need to write the reason for Rejection. If you want to send goods back to the customer then select “Send Goods Back to Customer”. 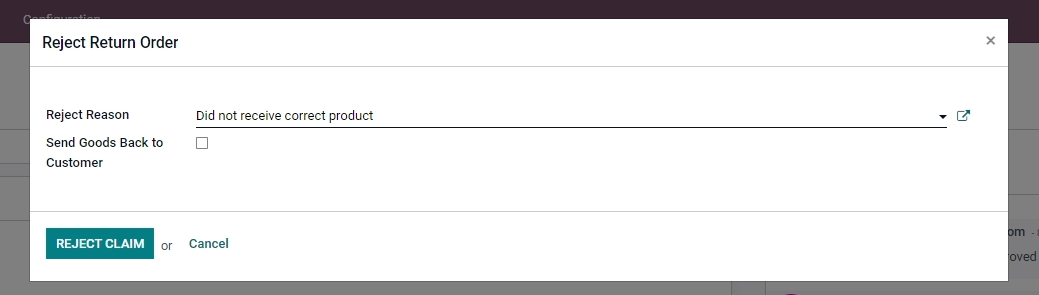
=> In case the Return Order is approved, the next step is to validate the same with appropriate RMA outcomes. For this follow the step explained in Step 7.
RMA Outcomes: It allows the user to select any 1 of 4 Return Operations which will be processed further for the relevant product.
Once the RMA is approved in above step, next select the relevant Return Operation in the RMA Outcomes column, and then validate the Return Order.
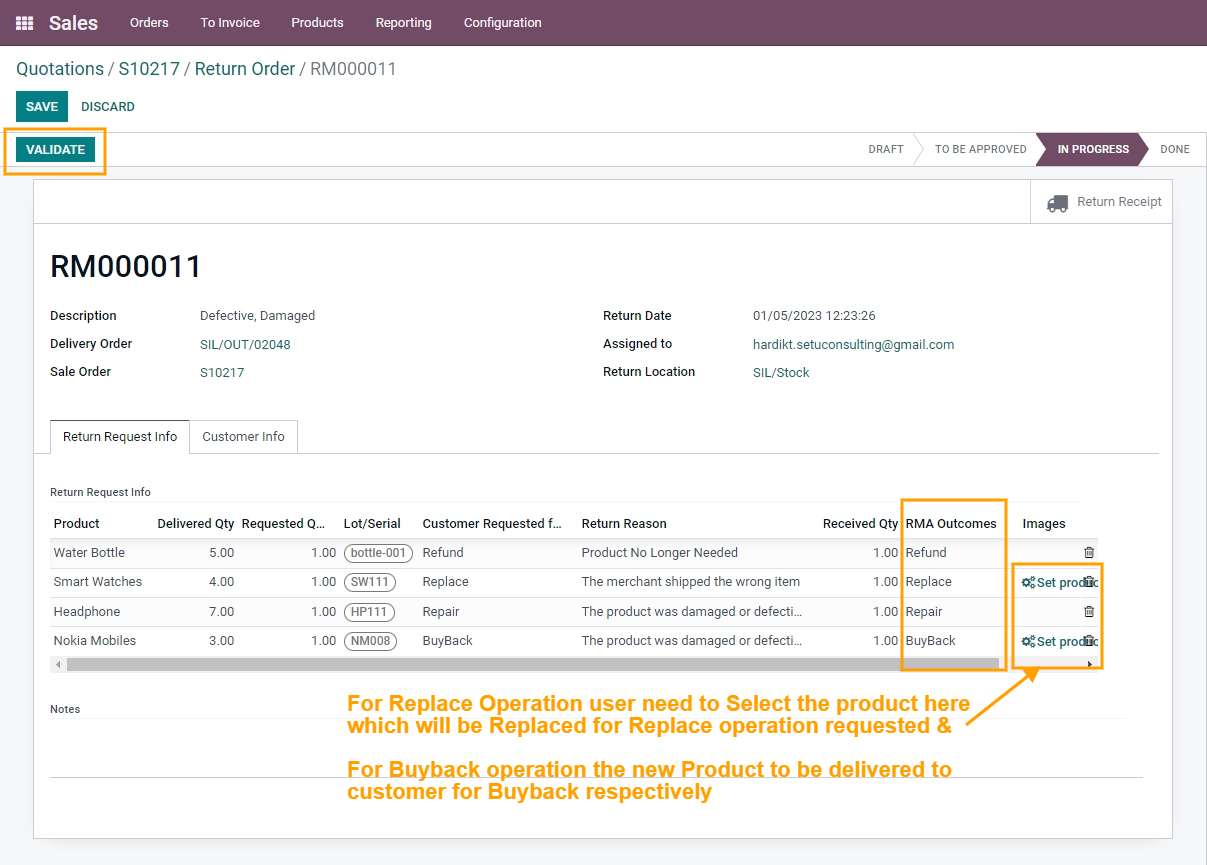
You need to validate the Delivery Order for Return operations of Replace product.
To Confirm the Repair Order switch back to
=> Fill in all the details in Repair Order as shown below.
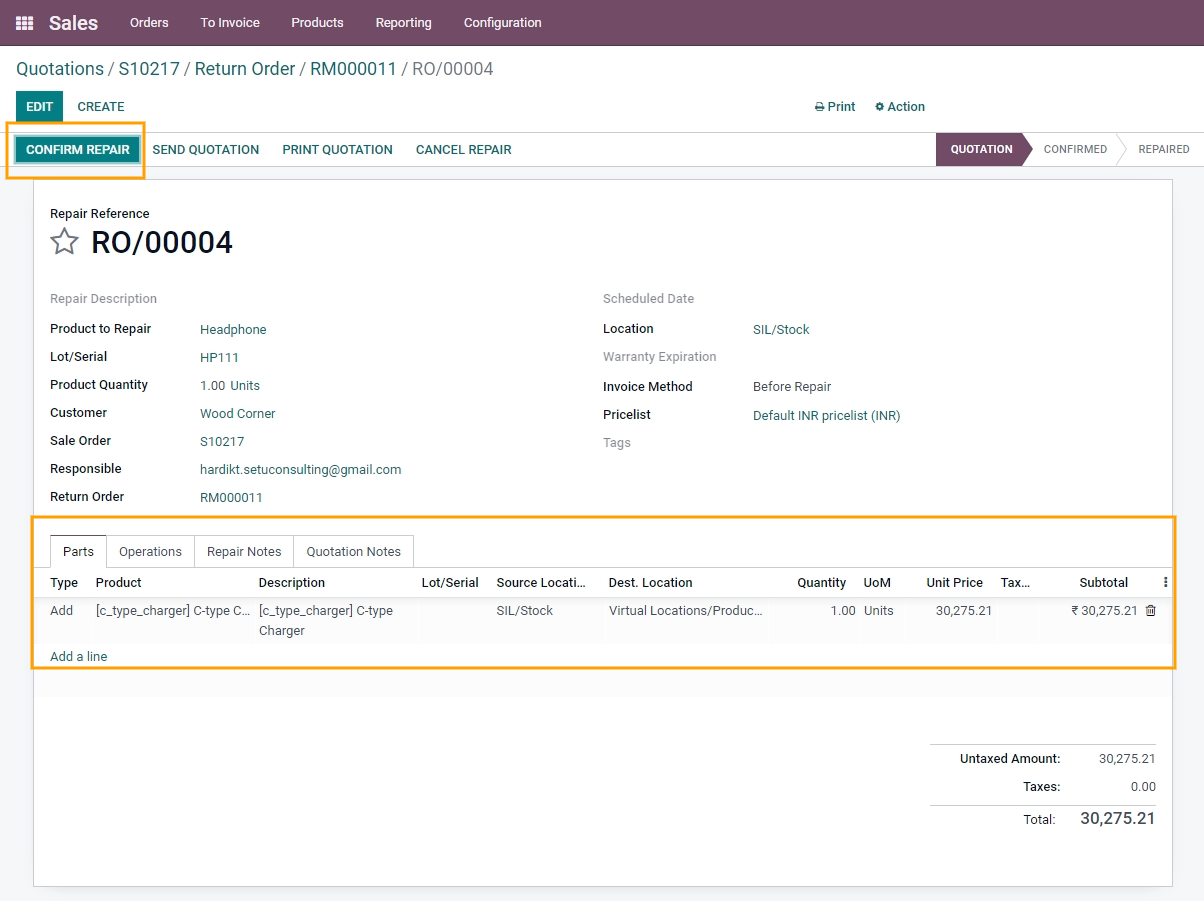
=> Confirm this Repair Order by clicking on Confirm Repair button.
=> Create Invoice
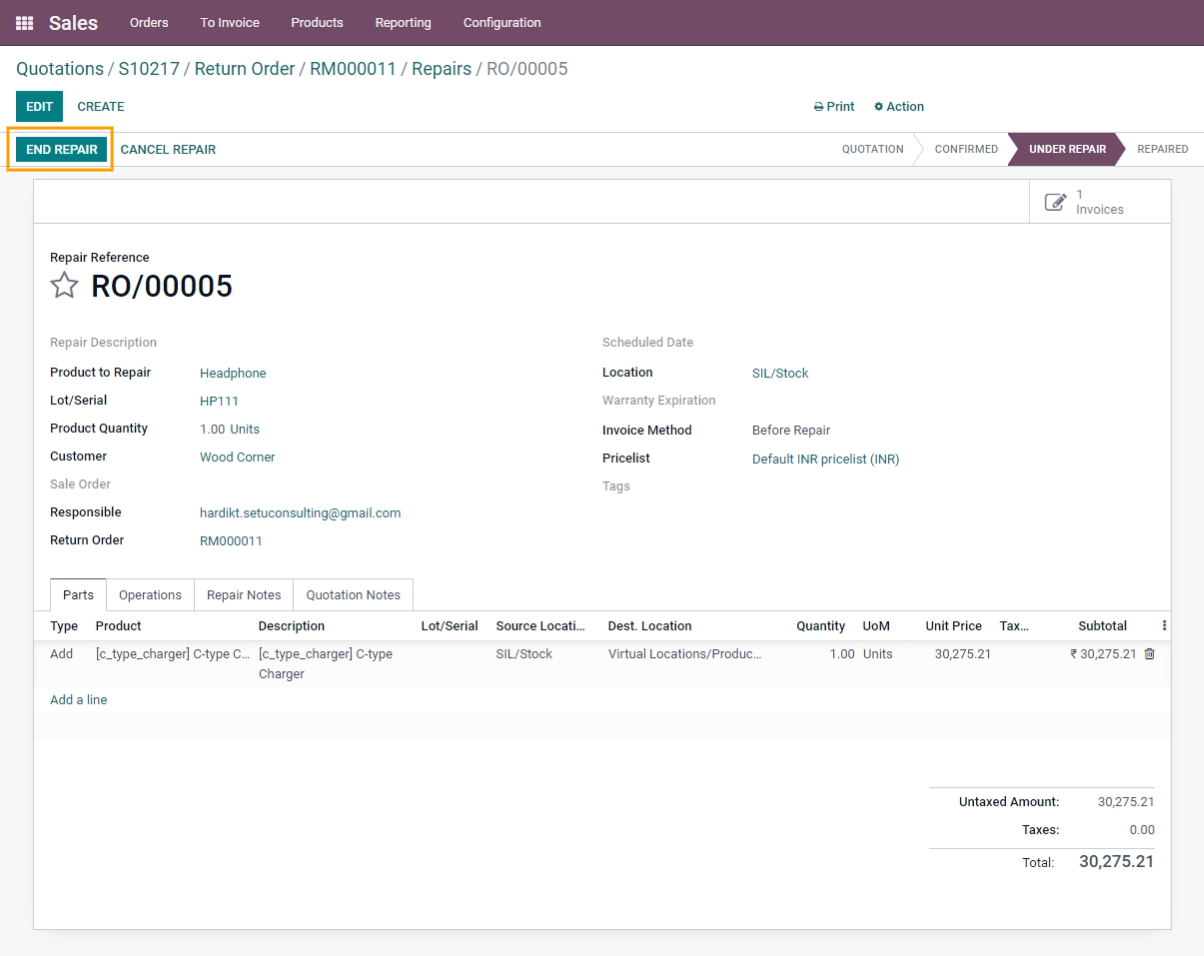
=> Start repairing the product by clicking on the Start Repair button
=> After the product has been repaired, complete the repair process by clicking the "End Repair" button, then confirm the invoice.
=> Confirm the Delivery order of the Repair product which is generated for the Repair Operation.
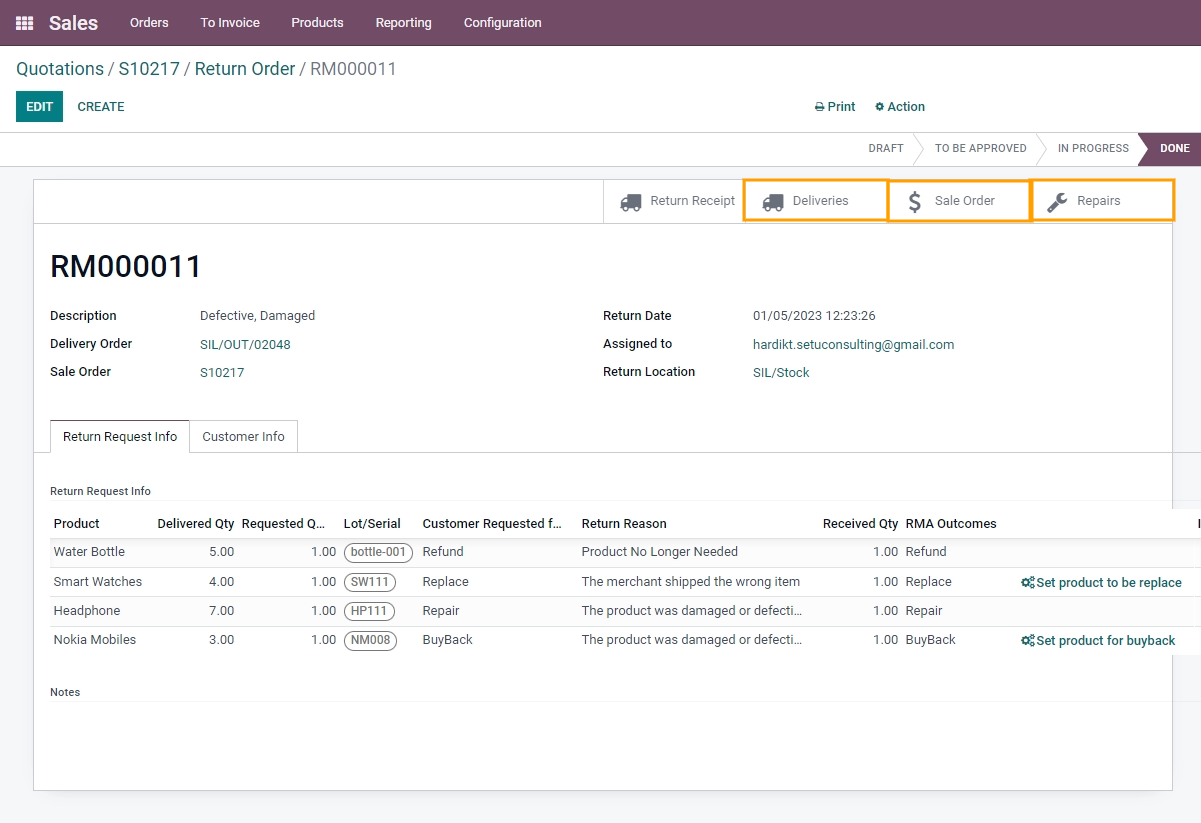
Once the delivery order for either or both Return operations (Replace or Repair) is completed, the status will be updated to "Done" as shown below.

Commenting is not enabled on this course.