How to create an Inventory Count Planner
How to create an Inventory Count Planner
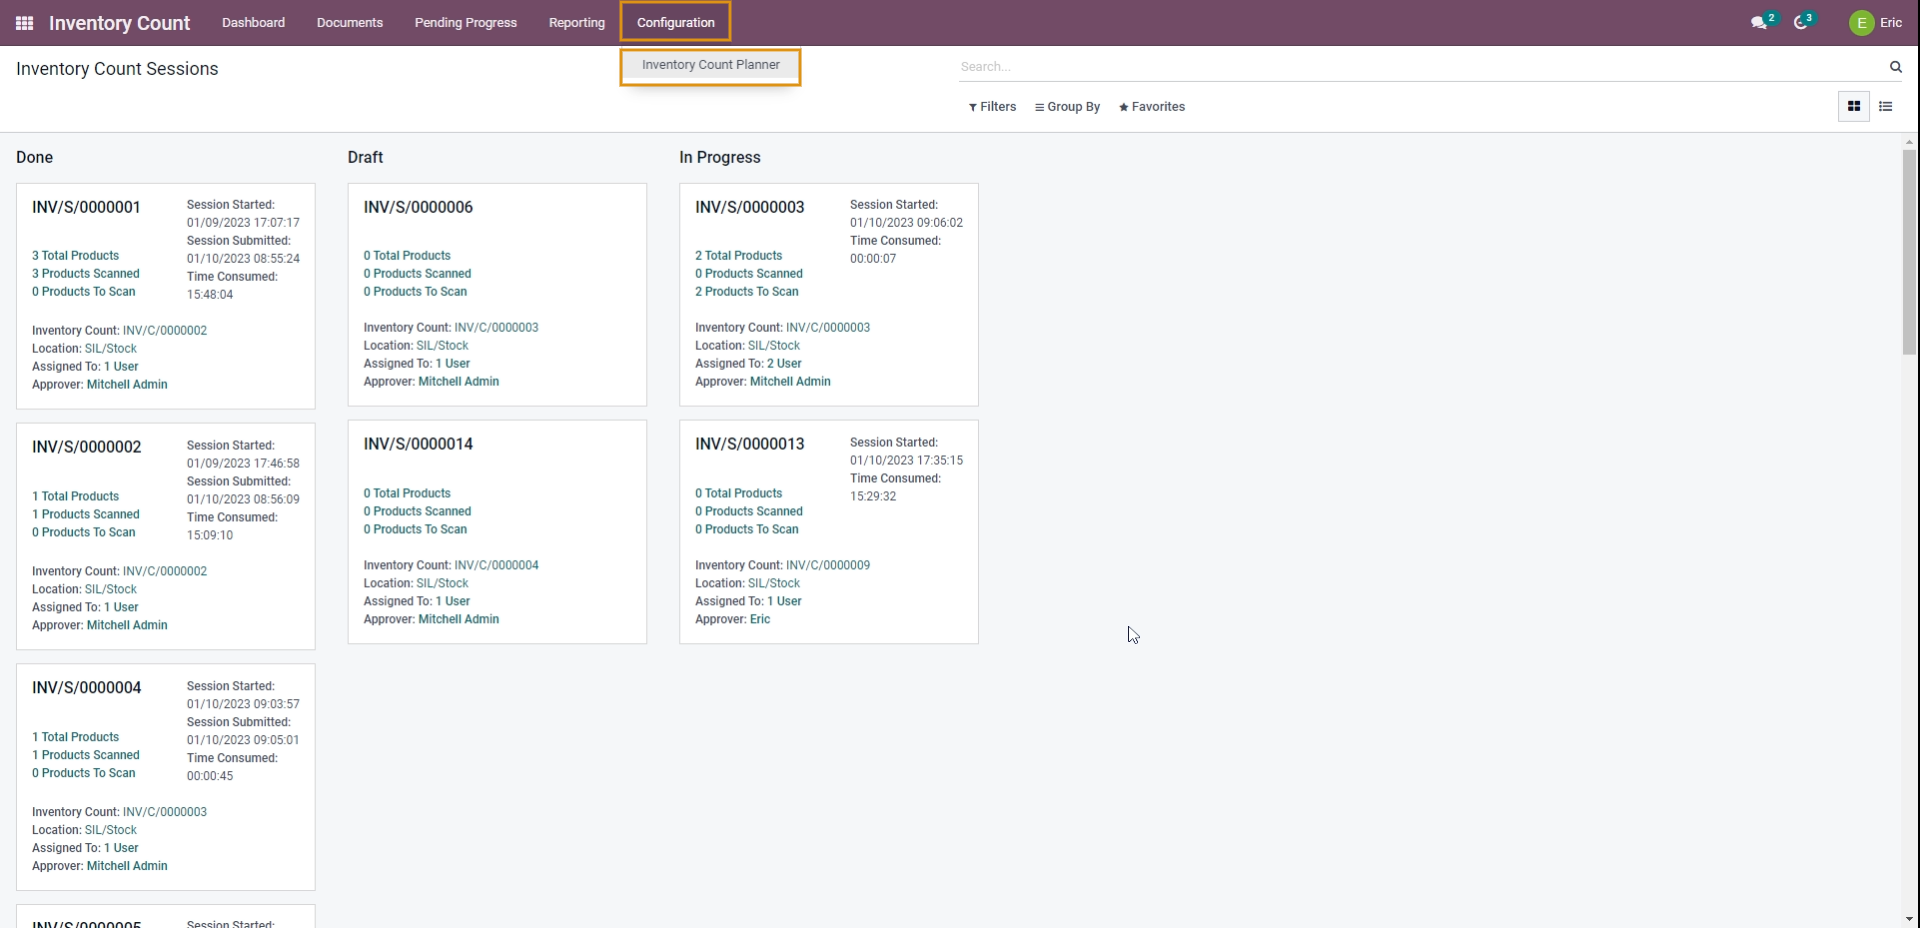
To Create an Inventory Count Planner navigate to
Click on CREATE to create a new Inventory Count Planner

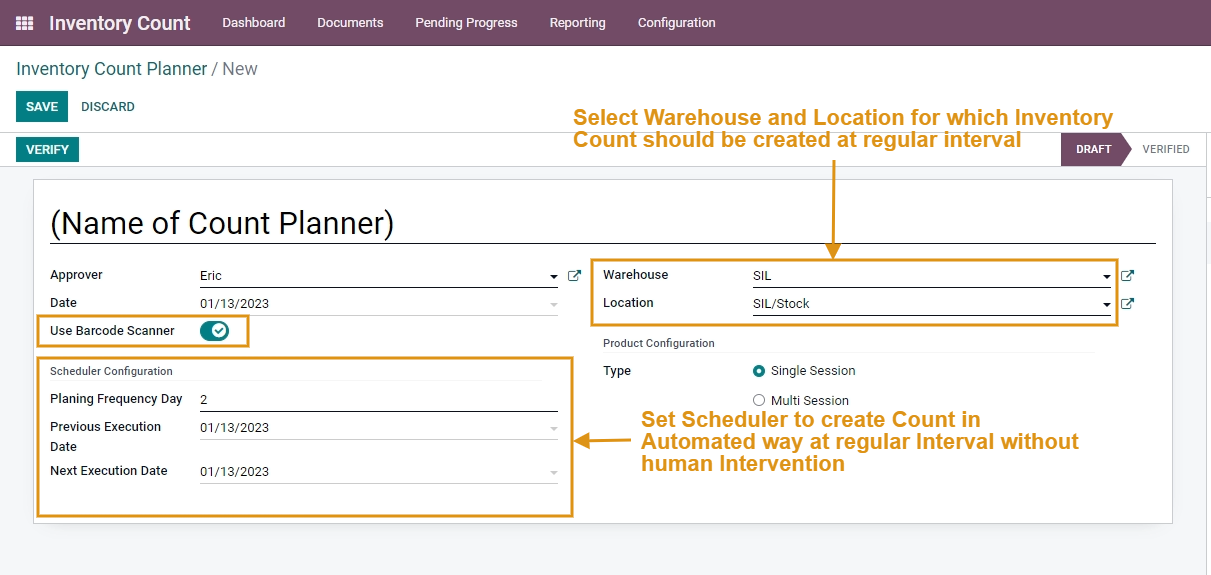
Fill in the details in the form as shown below.
Terminologies:
- Approver: Approver defines the person who has the right to take decisions and Either Approve or Reject the Physical Quantities counted by Employees.
- Warehouse and location: Select the Warehouse and Location for which you wish to Perform the Inventory Count.
- Enable/Disable Use Barcode Scanner Check box: This Check Box allows you to either Calculate Products manually or with a Barcode scanner.
- Type: Select the Single Session option here if you wish to perform a Physical Inventory Count for a Single time.
- Planning Frequency Day: It indicates the number of days after which the Inventory count should be generated automatically by the system without any human interventions.
- Previous Execution Date: It indicates the date on which previous Inventory Count was generated.
- Next Execution Date: It indicates the date on which the next Inventory Count will be generated. Here the next execution date will be set automatically by the system by adding Planning Frequency Day to the Previous Execution Date.
Click on Save and Verify button to complete creating Inventory Count Planner.
Commenting is not enabled on this course.